Whitelabel Setup Guide
Thanks for purchasing whitelabel and supporting us!
Please follow this guide very carefully. If you skip a single step, the process will not work. The setup is short, and will only need to be done once.
(Step 1 of 5) Link Patreon Account
If you haven't done so already, you'll need to link your Patreon and Discord accounts on this page.
Patreon has a longer guide on how to do this here.
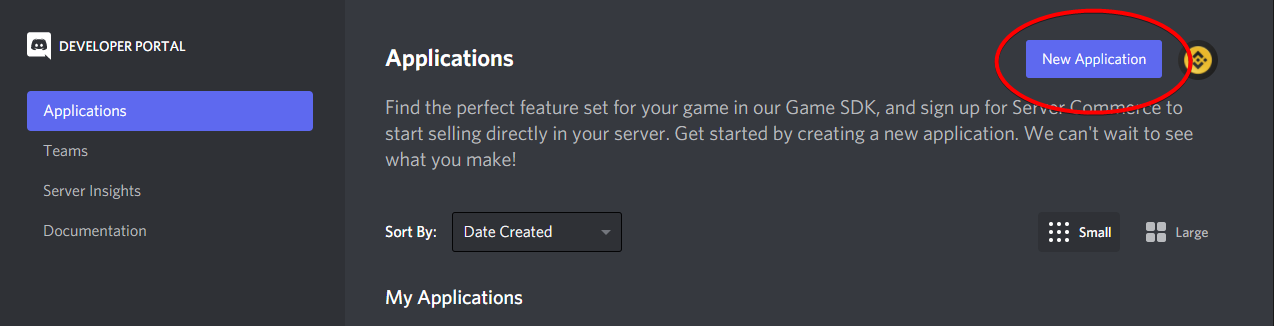
(Step 2 of 5) Create Bot
Next, you'll need to create your custom bot that Tickets will run under.
To do this, visit the Discord developer portal and press New Application in the top right:
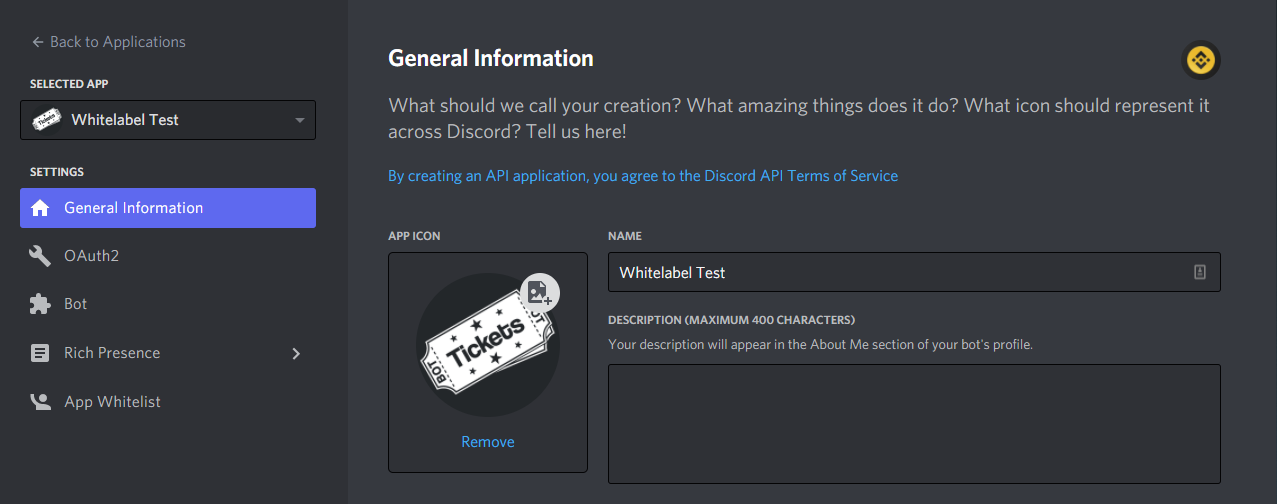
Enter a name for your bot and press create.
From here, you can change your bot's avatar:
(Step 3 of 5) Start Bot
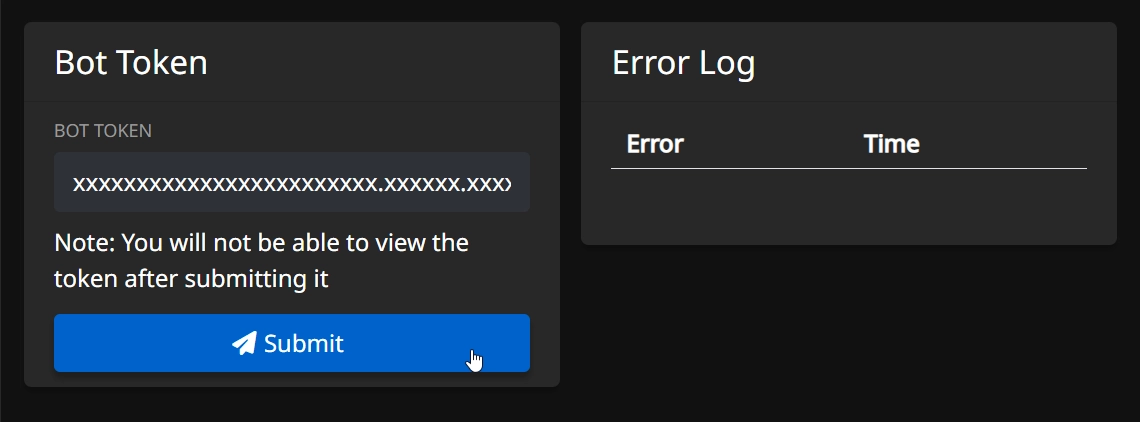
Next, you have to submit the bot's token. This is like a password to the bot. Never send this token to anyone, even in our support server.
Click on Bot on the sidebar of the Discord developer portal and copy the token (you may have to click the reset token button before you can copy):

Then head over to the Tickets dashboard Whitelabel section. Paste the token into the Bot Token field and press Submit:
Note:
- There may be up to a 10 minute delay for the whitelabel section of dashboard to recognize your status.
- Until it does, it will lead you back to the "buy premium/whitelabel" page.
You will then be presented with a message saying that the bot is now online.
If you receive an error, make sure that you copied the token (not the client secret) fully. Additionally, refresh the page and check the Error Log table for any errors.
(Step 4 of 5) Invite Bot To Server
Before you can invite the bot to your server, you must kick the main Tickets v2#5105 bot from your server. It is extremely important that you do this before inviting your custom bot to your server. If you do not do this, you risk data loss.
To invite your whitelabel bot to your server, click the Generate Invite Link button under the Manage Bot section.
Upon clicking the button, you will be taken to the normal bot invite page - select your server and authorise. It is important that you grant the bot all the permissions that it asks for.

(Step 5 of 5) Activate Premium Perks
The last mandatory step is to activate the premium perks that come with whitelabel for your server.
Note:
- There may be up to a 10 minute delay for the whitelabel bot to recognize the guild/server and synch commands.
- Until it does, it will error when running commands.
- If command errors, wait 10 minutes and try the command again.
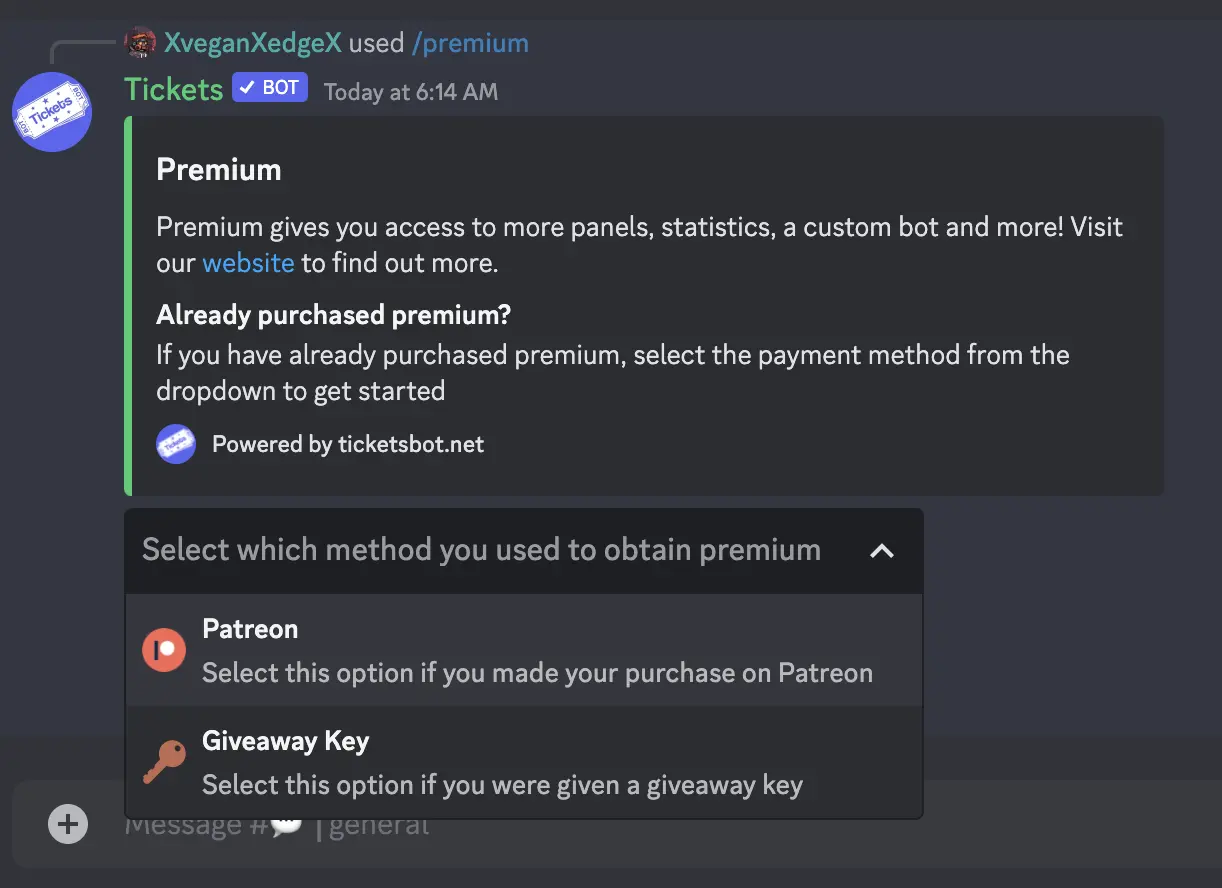
Go to your discord server and run the command /premium. You must select the command when it displays to you after typing. Make sure to choose patreon since that is how you paid for the whitelabel bot. Giveaway Key is not used here.
- If
Patreonis not a selectable option, then your premium perks are already applied to the server.
And you're done! Your bot should be ready for use.
There are a few more optional steps below, if you wish to take them.
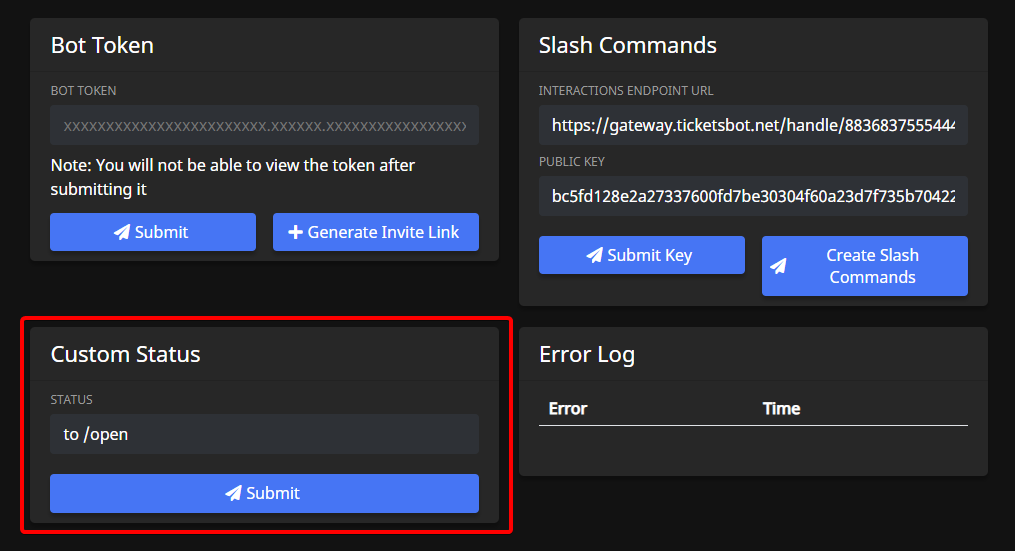
Optional: Set Custom Status
You can optionally change your custom bot's status. Simply enter the new status on the dashboard and press Submit.
Playing, Listening, and Watching are all currently available.
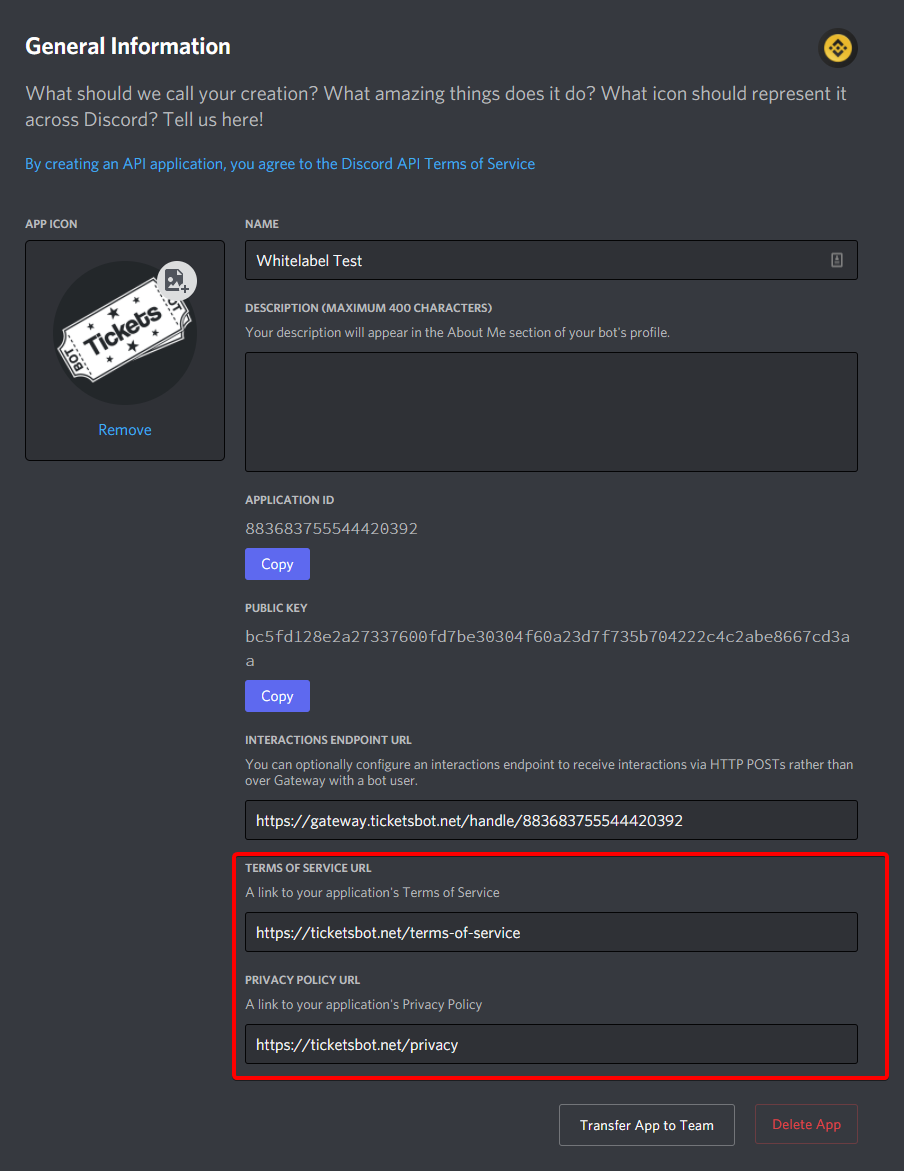
Optional: Set Privacy Policy & ToS Links
On the General Information tab of the Discord developer portal, you may have noticed Terms Of Service URL and Privacy Policy URL fields.
You should enter our policies here to inform users of how their data may be used.
Terms Of Service: https://tickets.bot/terms-of-service
Privacy Policy: https://tickets.bot/privacy